The Dell Rail Sizing and Rack Compatibility Matrix provides mounting features and key dimensions of the rack rails used for mounting many Dell Technologies enterprise systems and peripheral devices in a rack enclosure.
Dell Rail Sizing and Rack Compatibility Matrix
When using the Dell Rail Sizing and Rack Compatibility Matrix, you can locate the Dell product on the table. The table provides information on the rail identification, mourning interface, rail type, rack types supported, rail adjustability range (mm), and rail depth (mm).
This sizing matrix also provides a compatibility summary for select Dell Technologies racks and common third-party racks. However, the product list is not all inclusive and updates will be made as needed. The dimensions provided in this document are for reference only, minor deviations due to manufacturing tolerances and variances should be expected.
Key considerations to keep in mind when using the matrix are:
- The rack mount peripherals and cable bundles do not protrude into the space directly behind the systems.
- Dell rail kits with a Rail Identifier code are designed to be compliant with the Server System Infrastructure (SSI) Specification for Computer Server Cabinet Enclosures & Racks.
2-Post Rack and 4-Post Rack
Dell rail kits are designed to be installed into 4-post and 2-post racks with various flange hole designs.
- 4-post rack types - contain vertical mounting flanges with square-hole, unthreaded round-hole, or threaded round-hole designs as part of the rack and rail interface.
- 2-post rack types - generally contain threaded round-hole designs, requiring users to mount the server in either the front or center mount orientations. Stab-in static rail designs that are compatible with 2-pock rack configurations can be installed into 2-post racks. These rails typically require extra hardware to securely attach the rails to the rack.
Mounting Interference
The mounting interface describes the type of rail bracket design used for mounting the rail in the rack.
- ReadyRails II - supports tool-less installation in 4-post square-hole and unthreaded round-hole racks. It also supports tooled installation in threaded-hole racks. When installed in a square-hole rack, the bracket is placed flush against the mounting post. Installation in a round-hole rack results in a slight offset of approx. 6 mm from the mounting post, also resulting in a 6 mm bezel offset.
- ReadyRails - used for both static and sliding rails. It supports tool-less installation in 4-post square-hole and unthreaded round-hole racks. Additionally, it also supports tooled installation in threaded-hole racks and 2-post racks. When installed in unthreaded round-hole racks, the original ReadyRails will also have the 6 mm offset from the mounting post. To install sliding ReadyRails kits into a threaded-hole rack, adapter brackets are required.
- RapidRails - supports tool-less installation in 4-post square-hole racks only.
- VersaRails - supports tooled installation in 4-post square-hole and unthreaded round-hole racks. Mounting the VersaRails in threaded-hole racks is not recommended and is not supported by Dell Technologies.
- Generic - Encompasses all other mounting interfaces outside of the ones listed above. Unless specified to be tool-less, tools are required for installation.
Rail Types - System Installation Method
Drop-in/Stab-in Rails (Combo Rail) - allows a system to be fully extended out of the rack for service. You have the option to install the system into the rail using a drop-in method (ReadyRails sliding rails) or a stab-in method (ReadyRails static rails). Drop-in/Stab-in rails support CMA or SRB applications, these applications must be detached to remove the inner member from the rails.
- Drop-in design: the system is vertically installed into the rails by inserting the standoffs on the sides of the system into the “J-slots” in the inner rail members with the rails in the fully extended position. With a drop-in design, the recommended installation method is to insert the rear standoffs on the system into the rear J-slots on the rails to free up a hand. Then you need to rotate the system down into the remaining J-slots while using the free hand to hold the rail against the side of the system.
- Stab-in design: the inner (chassis) rail members must be attached to the sides of the system and then inserted into the outer (cabinet) members installed in the rack. For systems that are 2U and larger, two people are required to perform this installation.
Sliding Rails - allows a system to be fully extended out of the rack for service. Most sliding rails support Cable Management Arms (CMAs). This enables the system to be extended out of the rack without disconnecting data/power cables at the rear of the system. Sliding rails are essential drop-in rails unless indicated that it is not.
Static Rails - allows for more flexibility in the types of racks and installations supported. This rail type does not support the ability to service the system in the rack and is not compatible with the CMA.
Stab-in Static Rails - you need to attach the inner rail members (chassis) to the sides of the system and then insert them into the outer rail members (cabinets) installed in your rack. For 2U systems and larger, it is best to do this operation with two people.
Stab-in Sliding Rails - you need to attach the inner rail members (chassis) to the sides of the system and then insert them into the outer (cabinet) members installed in the rack. Allows a system to be portion extended out of the rack for service. For 2U systems and larger, it is best to do this operation with two people. This rail type is compatible with cable management arm (CMA) and strain relief bar (SRB) solutions.
L-bracket Static Rails - do not allow for the full extension of a system out of the rack into a service position. This rail type is usually not compatible with cable management solutions, unless specified. Equipment supported by an L-bracket is usually customer serviceable from the front or back of the rack.
Cable Management Solutions
You can use a Cable Management Arm (CMA) or Strain Relief Bar (SRB) to manage the cables that come with the rack-mounted server. Most sliding rails offer an optional CMA. CMAs can be mounted on either the left or right side without any tools.
When using a CMA or SRB with a deeper system, it could interfere with the access to power distribution units (PDUs) in certain racks. Additionally, the outer CMA mounting brackets can be removed from some of the sliding rail kits if a configuration does not require a CMA support. This reduces the overall length of the rails and eliminates potential interference with rear-mounted PDUs or the rack rear door.
- Cable Management Arm (CMA) - connect to the rails behind the system. Allows for a fully cabled system to be extended out the rack into a service position.
- Strain Relief Bar (SRB) - usually attaches to the back of the rails via the strain relief
bar brackets. The cables from the back of the chassis are placed across the top of the SRB and are secured by straps. As an additional way to manage cables at the back of the system, SRBs are available for some systems because the cable bundle size may be larger than the CMA’s capacity. Compared to a CMA, the rail depth of a SRB is lower. However, it allows the rails to fit in shallow racks. For systems on sliding rails, cable service loops are required to fully extend out of the rack completely for service.
Dell Server Rail Kit Compatibility
RackSolutions offers a large selection of server rack rails as an alternative or replacement to OEM rail kits. We have multiple sliding or fixed rack rail kits available for Dell servers. Most of our sliding rail kits also include an integrated cable management arm.
Before selecting a server rail, you need to identify your server model. Dell PowerEdge servers with common design components are grouped into generations. The server naming of models provides insight to the generation, class of system, form factor or CPU socket count. You can check out our Dell Product Guide to learn more about the Dell PowerEdge Server Naming Convention. You can also refer to Dell Support for more information on identifying your server’s model number.
RackSolutions Specs and Rack Compatibility
To learn more about the specific server specifications for your server, our rail guides provide information on compatible mounting equipment. All of our rail guides include direct links to mounting products that are compatible with your servers and information about dimensional limitations. Mounting products include slide rails, universal rails, standard EIA 19 inch racks, rack shelves, cable management, adapters, and a universal rack-to-tower conversion kit.

Rail Compatibility Guides
Do You Need a Custom Rail Kit?
Depending on your specific needs, RackSolutions is always prepared to design solutions and immediately send out prototypes. Our rail kits are designed in house and are custom made to last. If you need a custom rack rail kit, then we can make it happen!
To contact our Sales and Technical Support for further assistance, please email Will Beene at will@racksolutions.com or call (903) 453-0835. Our hours of operation are 8:00 AM – 5:00 PM, CDT, Monday – Friday.
FAQs: Server Rack Rails
What U height should my rail be?
If you are buying rails which are designed for a specific server, they are already sized to be the optimal U height for that piece of equipment. Universal rails, on the other hand, will be able to hold your server as long as it is under the weight capacity. For instance a 1U universal rail can hold a 2U server as long as that server is less than 45 lbs. Best practice is to purchase a rail that takes up the same number of rack units as your server.
What is the difference between mounting depth and equipment depth?
The mounting depth refers to what sized rack the rail will fit inside. Essentially, it is the dimension from the front of the front rack angle to the back of the back rack angle. Most server racks have a mounting depth that can be adjusted, so it’s a good idea to make sure that the rails used for all your equipment match the depth of your rack. The most common depth is between 28″-29″
Equipment depth describes what length equipment must be to fit on the rail. A universal rail can mount equipment up to 35” deep, which is typically relevant to rails that are compatible with multiple servers.
What’s the easiest way to install cage nuts?
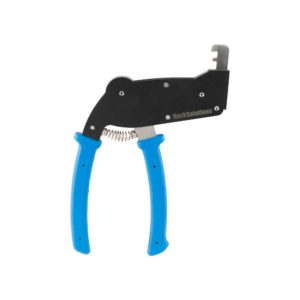
Before installing your server rails, we recommend using our Cage Nut Tool. Cage nuts can be installed without tools, but after putting in a couple, it can be uncomfortable. To avoid hurting your hands, our cage nut tool is great for making your installation process as painless as possible.
World’s Best Cage Nut Tool
Is hardware included with the rack rails ?
Most of our rails are compatible with square, round or threaded hole racks. That’s why we include all the necessary hardware to mount the rails on any rack! All that’s needed is a Phillips head screwdriver, unless you have tool-less rails, in which case you’ll have no tools at all.

