Since Mac Minis came into the market in 2009, there have been ‘server’ versions and ‘regular’ versions. The server model in particular led to a large amount of people looking for solutions to rack mount their Mac Mini.
Nowadays, there aren’t specific ‘server’ versions of Mac Minis, but Mac OS allows you to use the Mini as a ‘File Server’, ‘Time Machine Server’ and ‘Caching Server,’ making it a simple solution for various needs. Additionally, some companies store tons of Mac Minis either for development purposes or to rent out virtual machines.
So, let’s take a look at some great ways to get these things into a rack.
1U Rack Mount Shelf for Apple Mac Mini
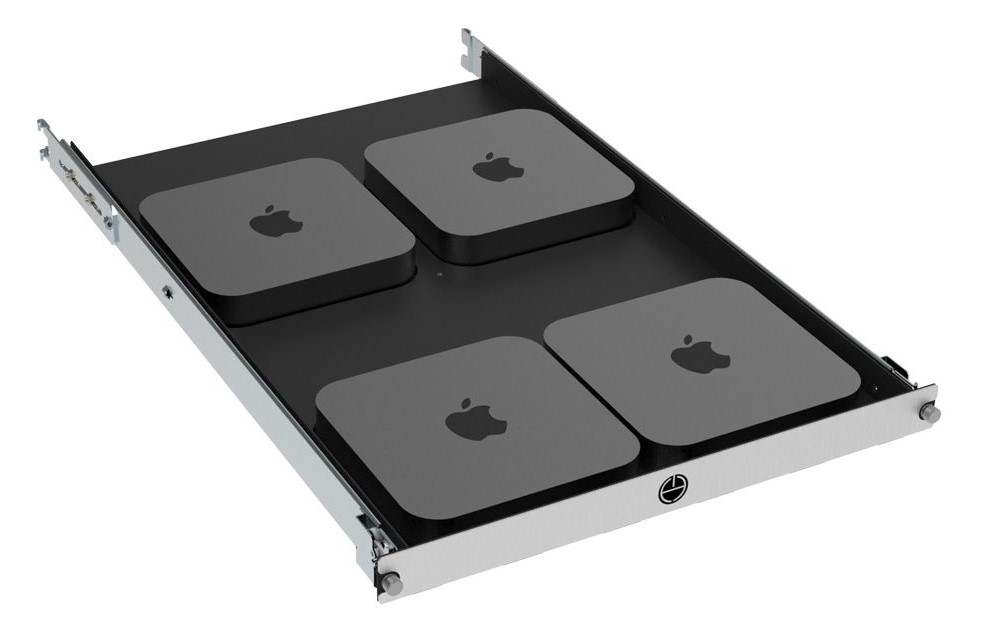
Amazingly, due to the modern form factor of the Mac Mini, it fits perfectly inside of a single rack unit (1U) space. Because of this, users can manage an array of Mac Minis for various use-cases inside of their rack.
If you’re stacking more than one U space full of Mac Minis, cooling can become an issue. This is why the RackSolutions 1U Rack Mount Shelf for Apple Mac Mini perfectly engineered slots for the Mac Mini to rest in while directing airflow.
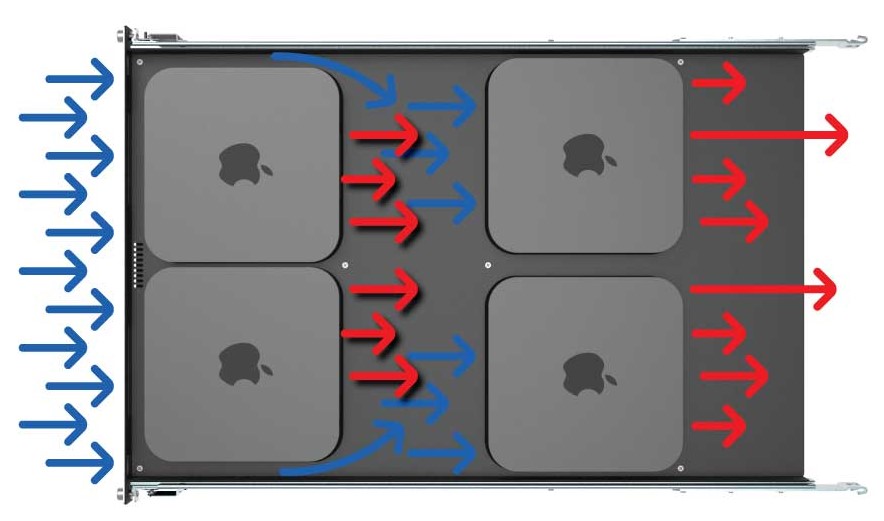
This feature simultaneously adds stability and allows a discreet method of venting air. Mac Mini fans are on the bottom of the chassis, right below the surface layer of the shelf. There are openings for ventilation beneath the surface layer running from the front to the back of the shelf so that cold air can be pulled in, directed through the Mac and exhausted out of the back.
All the while, the design, inspired by apple, gives a sleek appearance that matches the aluminum finish of your Mac.
1U 2-Post Rack Mount Shelf for Apple Mac Mini
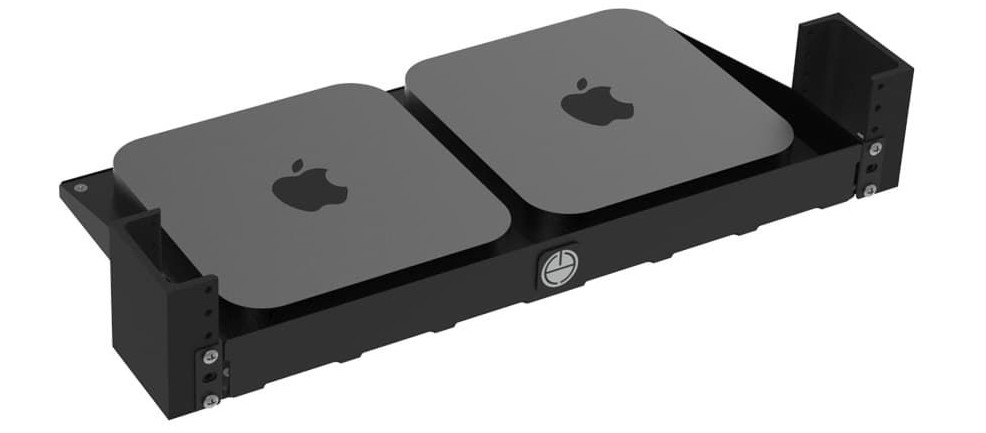
For those who opt for a 2 Post rack, we have a similar solution. Our 1U 2-Post Rack Mount Shelf for Apple Mac Mini is designed almost identically to the four post version, except that it houses two Mac Minis.
This model is compatible with 2nd and 3rd generation Mac Minis or the new Developer Transition Kits while they’re available.
HyperShelf for Apple Mac Mini
Designed for enterprise deployments and data center environments, our HyperShelf is perfect for those who have more than 4 mac minis. Instead of using multiple 1U rack mount shelves to manage your devices, you can rack mount up to 16 mac minis per 5 rack units of space with the HyperShelf.
This shelf will help you increase shelf density for all your devices while decreasing your deployment time. Featuring integrated airflow for cooling and thermal efficiency, you can also be confident that your 16 mac minis will not overheat.
How to install a Mac Mini shelf in a 4 post rack
RackSolutions uses a tool-less installation method for the 4 post model that will get you up and running in minutes.
The rails are shipped pre-attached to the shelf, but are easily removed. After you do so, just follow the steps in this video.
- Latch the back of the rail onto the appropriate square holes in your rack
- Pulling on the rail will trigger a spring mechanism, allowing you to expand the rail and attach the front end to the front posts
- Repeat the same process with the next rail
- Install the shelf by sliding it into the mounted rails
Afterwards, simply seat the Mac Minis into their respective slots and attach cables. No locking mechanisms are necessary as the slots are designed to perfectly fit the Macs so that there is no wiggle room.
How to install a Mac Mini shelf in a 2 post rack
The 2 post model is compatible with round, threaded and square hole racks. If you’re using a square hole rack you will also need cage nuts, which are included in the package if purchased new.
No matter what hole type your rack has, the installation is very simple. Align the shelves ears to whichever holes in the rack you desire and install with 12-24 Pan Head Screws that are included in the set.
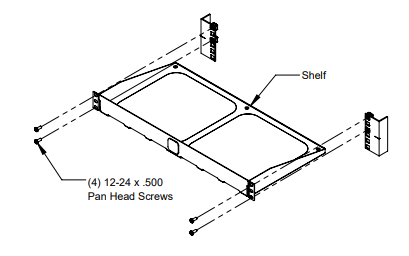
If you have square holes, you will need to install cage nuts before this process.
Just like the 4 Post shelf, you can seat the Mac Minis simply by placing them in their slots. Afterwards, plug in your cables and you should be good to go.
How to install a HyperShelf in a 4 post rack
- Remove the outer rails by sliding them back.
- Attach the outer rails to the rack. Use the head screws to secure the outer rails and rear outer rails.
- Install the shelf by sliding it into the mounted rails.
- Install the cable management arm to the shelf for in-rack serviceability.
- Place mac minis into their slots and organize cables through the integrated tie points.
Any questions?
We specialize in bringing custom solutions to customers. If you need a unique solution to rack mount your Mac Minis, then let us know and we will be able to make it for you!